Storing files in the cloud has become second nature for most of us. Services like Dropbox and Google Drive provide excellent convenience, offering easy access to your files from anywhere.
But one thing they don’t always offer is complete privacy.
In this post, we’ll explore why mainstream cloud storage providers aren’t fully secure, and how you can use Cryptomator, a free and open-source tool, to add an extra layer of privacy and security before uploading your files to the cloud. By the end, you’ll know how to easily encrypt your files to protect any sensitive data you might have, giving you peace of mind when using mainstream cloud storage services like Dropbox and Google Drive.
Cloud Storage Providers: Convenient, But Not Fully Secure
Most cloud storage services like Dropbox, Google Drive, and Microsoft OneDrive only offer server-side encryption as opposed to full end-to-end encryption. This means your files are decrypted when they reach the storage providers’ servers. Since they store your encryption keys, they (or anyone who breaches their servers) can access your files.
This makes your data vulnerable to both hacker attacks and bad actors from within the company.
If you’re looking to store sensitive information on the cloud — whether it’s personal documents, financial data, or confidential work files — having a good password and setting up two-factor authentication for your cloud storage account isn’t enough.
You’ll need to take one extra step to encrypt your files so only you can access them.
This is where a tool like Cryptomator comes in.
What Is Cryptomator and How Does It Work?
It’s a free, open-source encryption tool that allows you to encrypt your files before you upload them to your favorite cloud provider. Unencrypted data is never sent to the cloud. Your files are safe and secure no matter where you choose to store them.
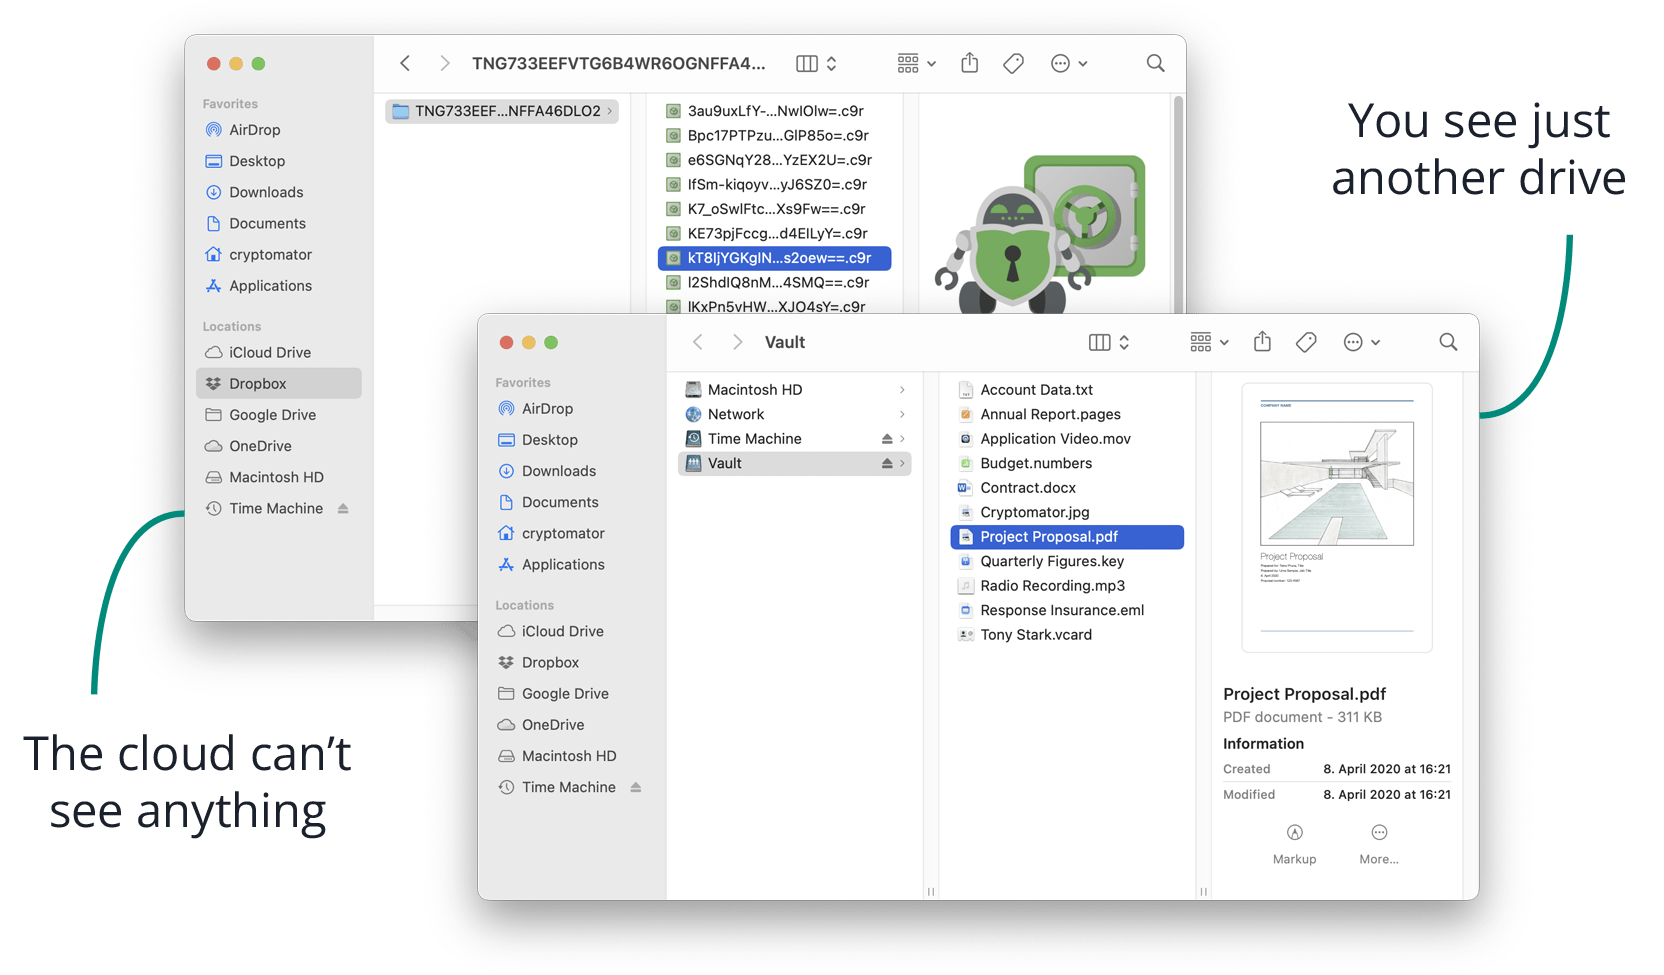
See those weird looking documents on the left side of the image above? Those are your files. But encrypted.
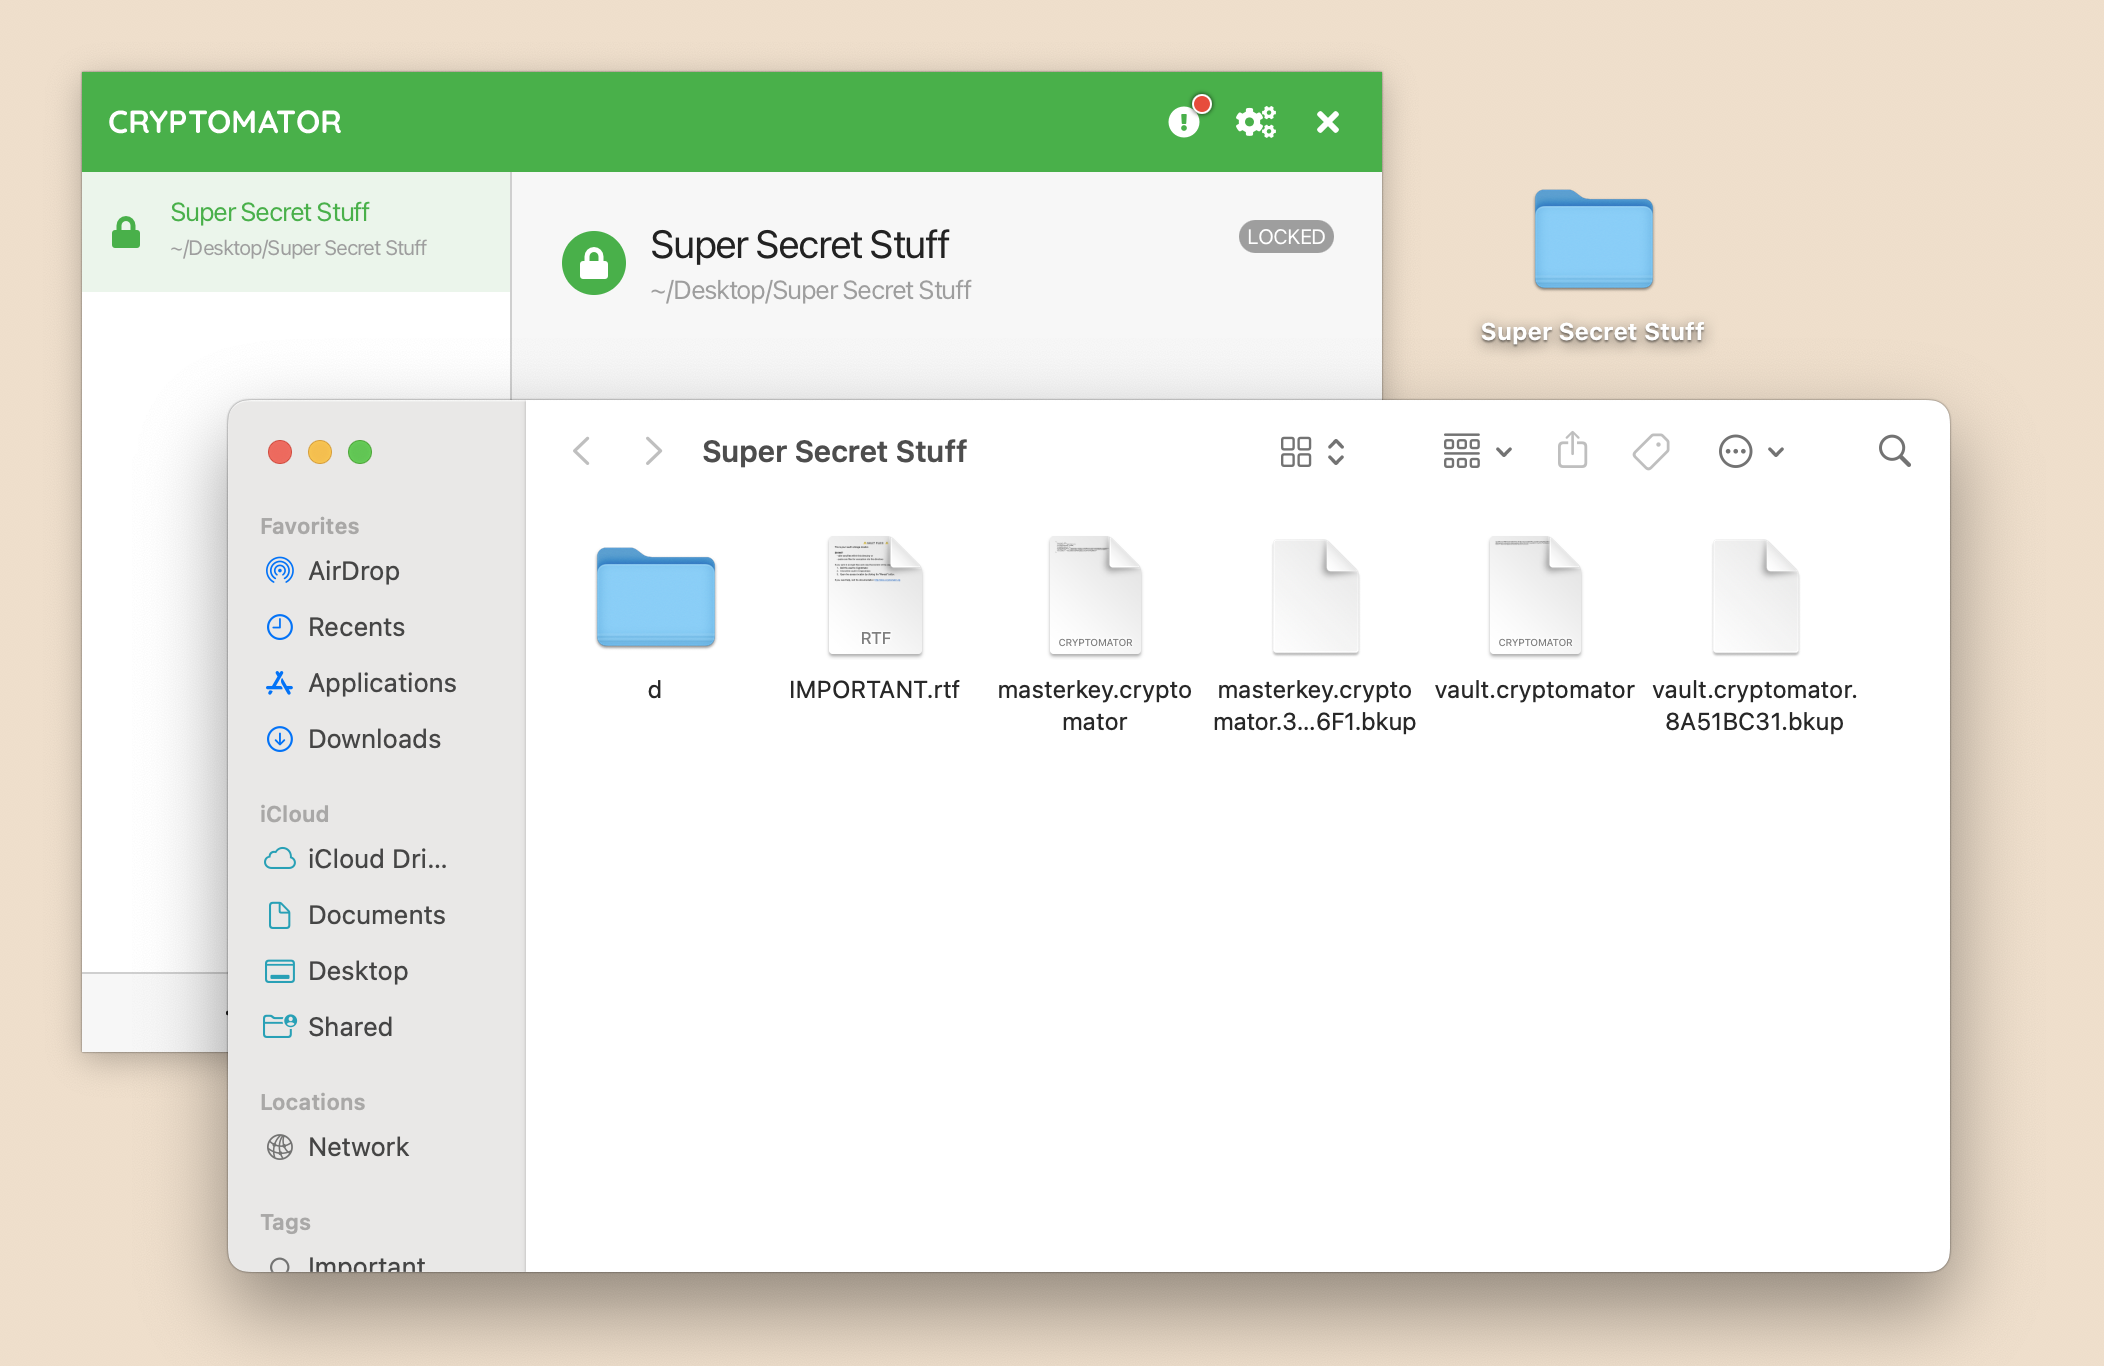
With Cryptomator, you create a password-protected vault where you put in all your sensitive files. The contents of the vault only appear when you unlock it with 1) the Cryptomator app, and 2) your password, which acts as the encryption key.
Without those two things, the contents of your vault is nothing but a bunch of gibberish text. So even if someone gains access to your cloud storage provider’s servers (or if a hacker gets into your cloud account), they won’t be able to read your encrypted files whatsoever.
When you want to access your files, you simply unlock your vault using Cryptomator and then your files will show up normally in a virtual drive on your computer.
How to Use Cryptomator with Dropbox, Google Drive, iCloud Drive, etc.
Let’s say you want to create a vault called “Super Secret Stuff” and encrypt it before uploading to the cloud. Here’s how you can do that with Cryptomator.
Step 1: Download and Install Cryptomator
Visit the Cryptomator website, download the application for your operating system, and then install it.
Step 2: Create a New Vault for Your Sensitive Files
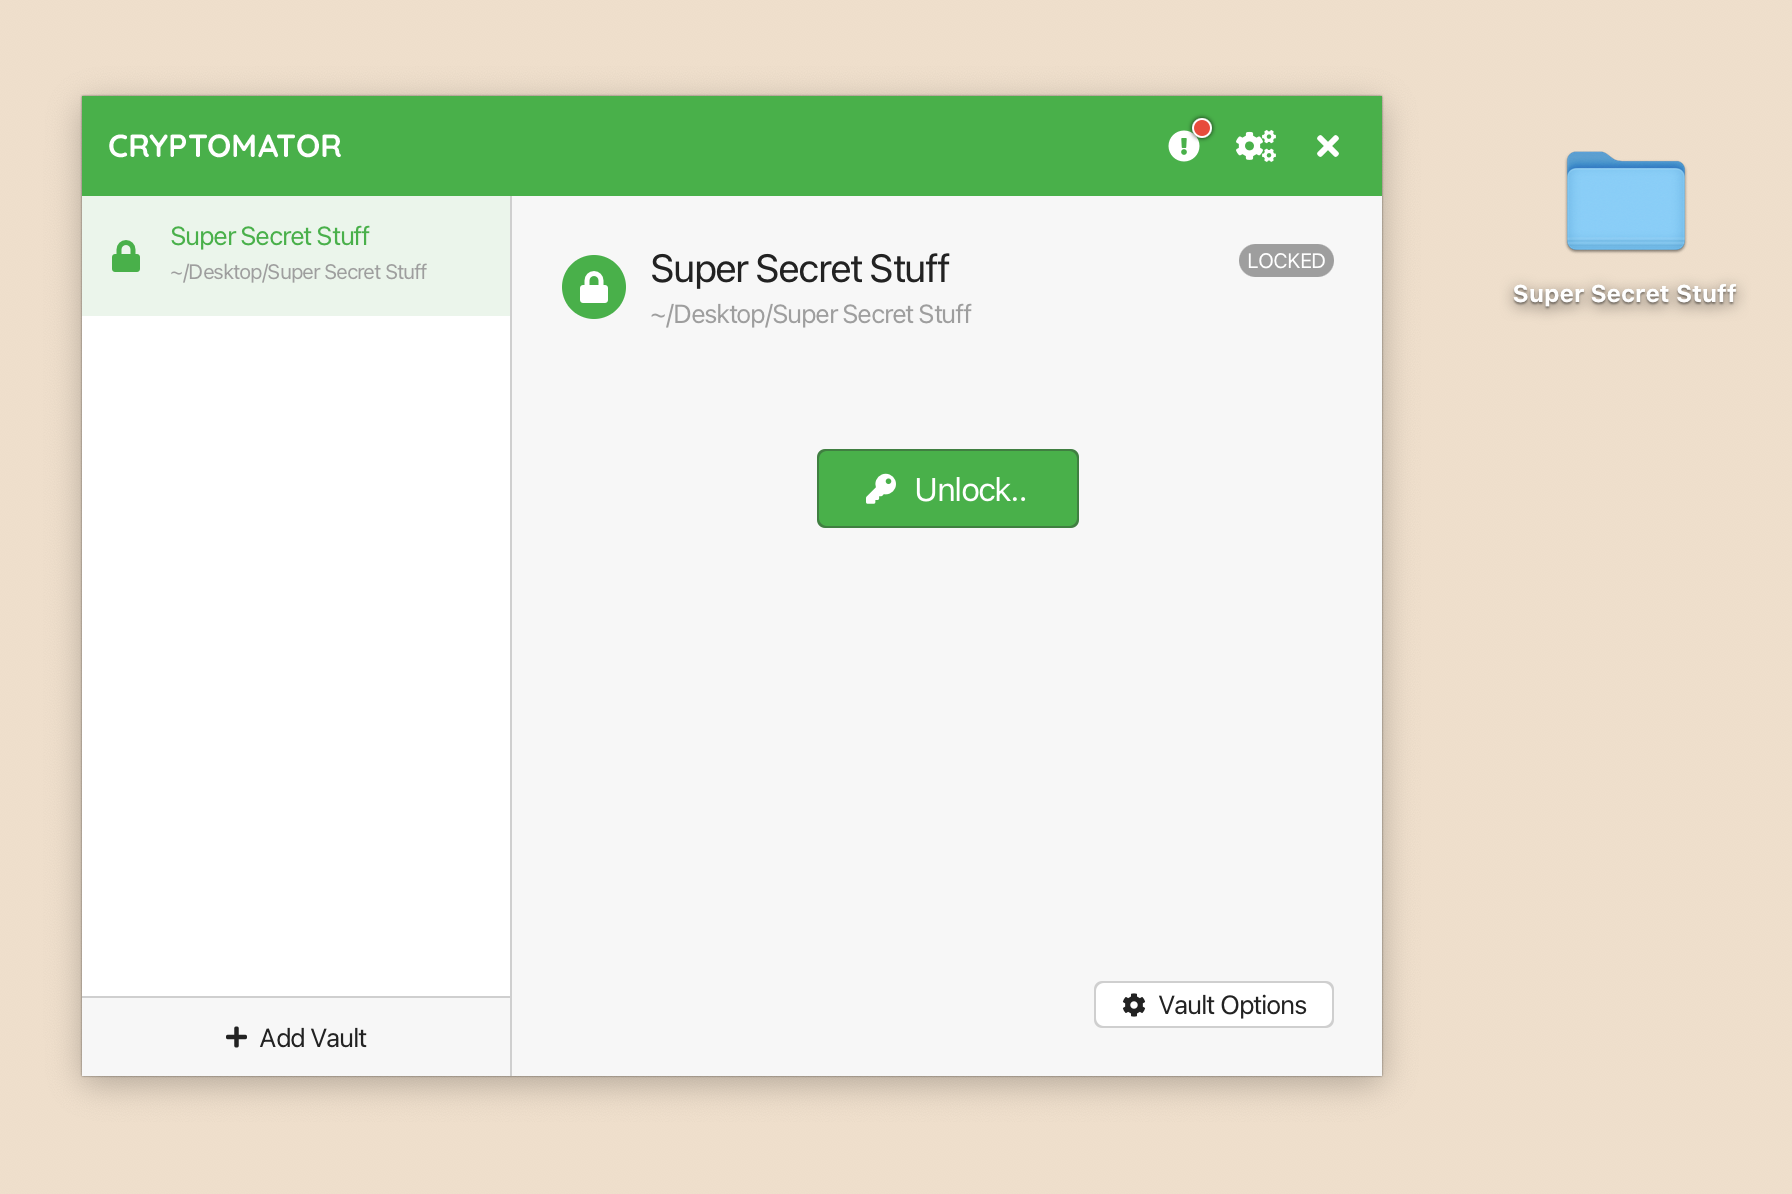
- Open Cryptomator and click the “Add Vault” button.
- Select “Create New Vault.”
- Choose a name for your vault. In this example, we’ll call it “Super Secret Stuff”.
- Next, select a location to store the encrypted vault. For now, I’ll have the vault sit in the Desktop of my computer. If you have an integration with a cloud provider on your computer, select the appropriate directory in this step. This will allow the encrypted vault to sync with your cloud storage automatically.
- Set a strong password. Make sure it’s something you can remember, or a complex one that you store in a password manager. The password is your encryption key. If you lose it, there’s no way to recover your files.
Step 3: Add Files to Your Vault
- Once your vault is created, click “Unlock” to open it.
- Cryptomator will mount the vault as a virtual drive on your system. This virtual drive will behave like a USB stick, allowing you to drag and drop files into it.
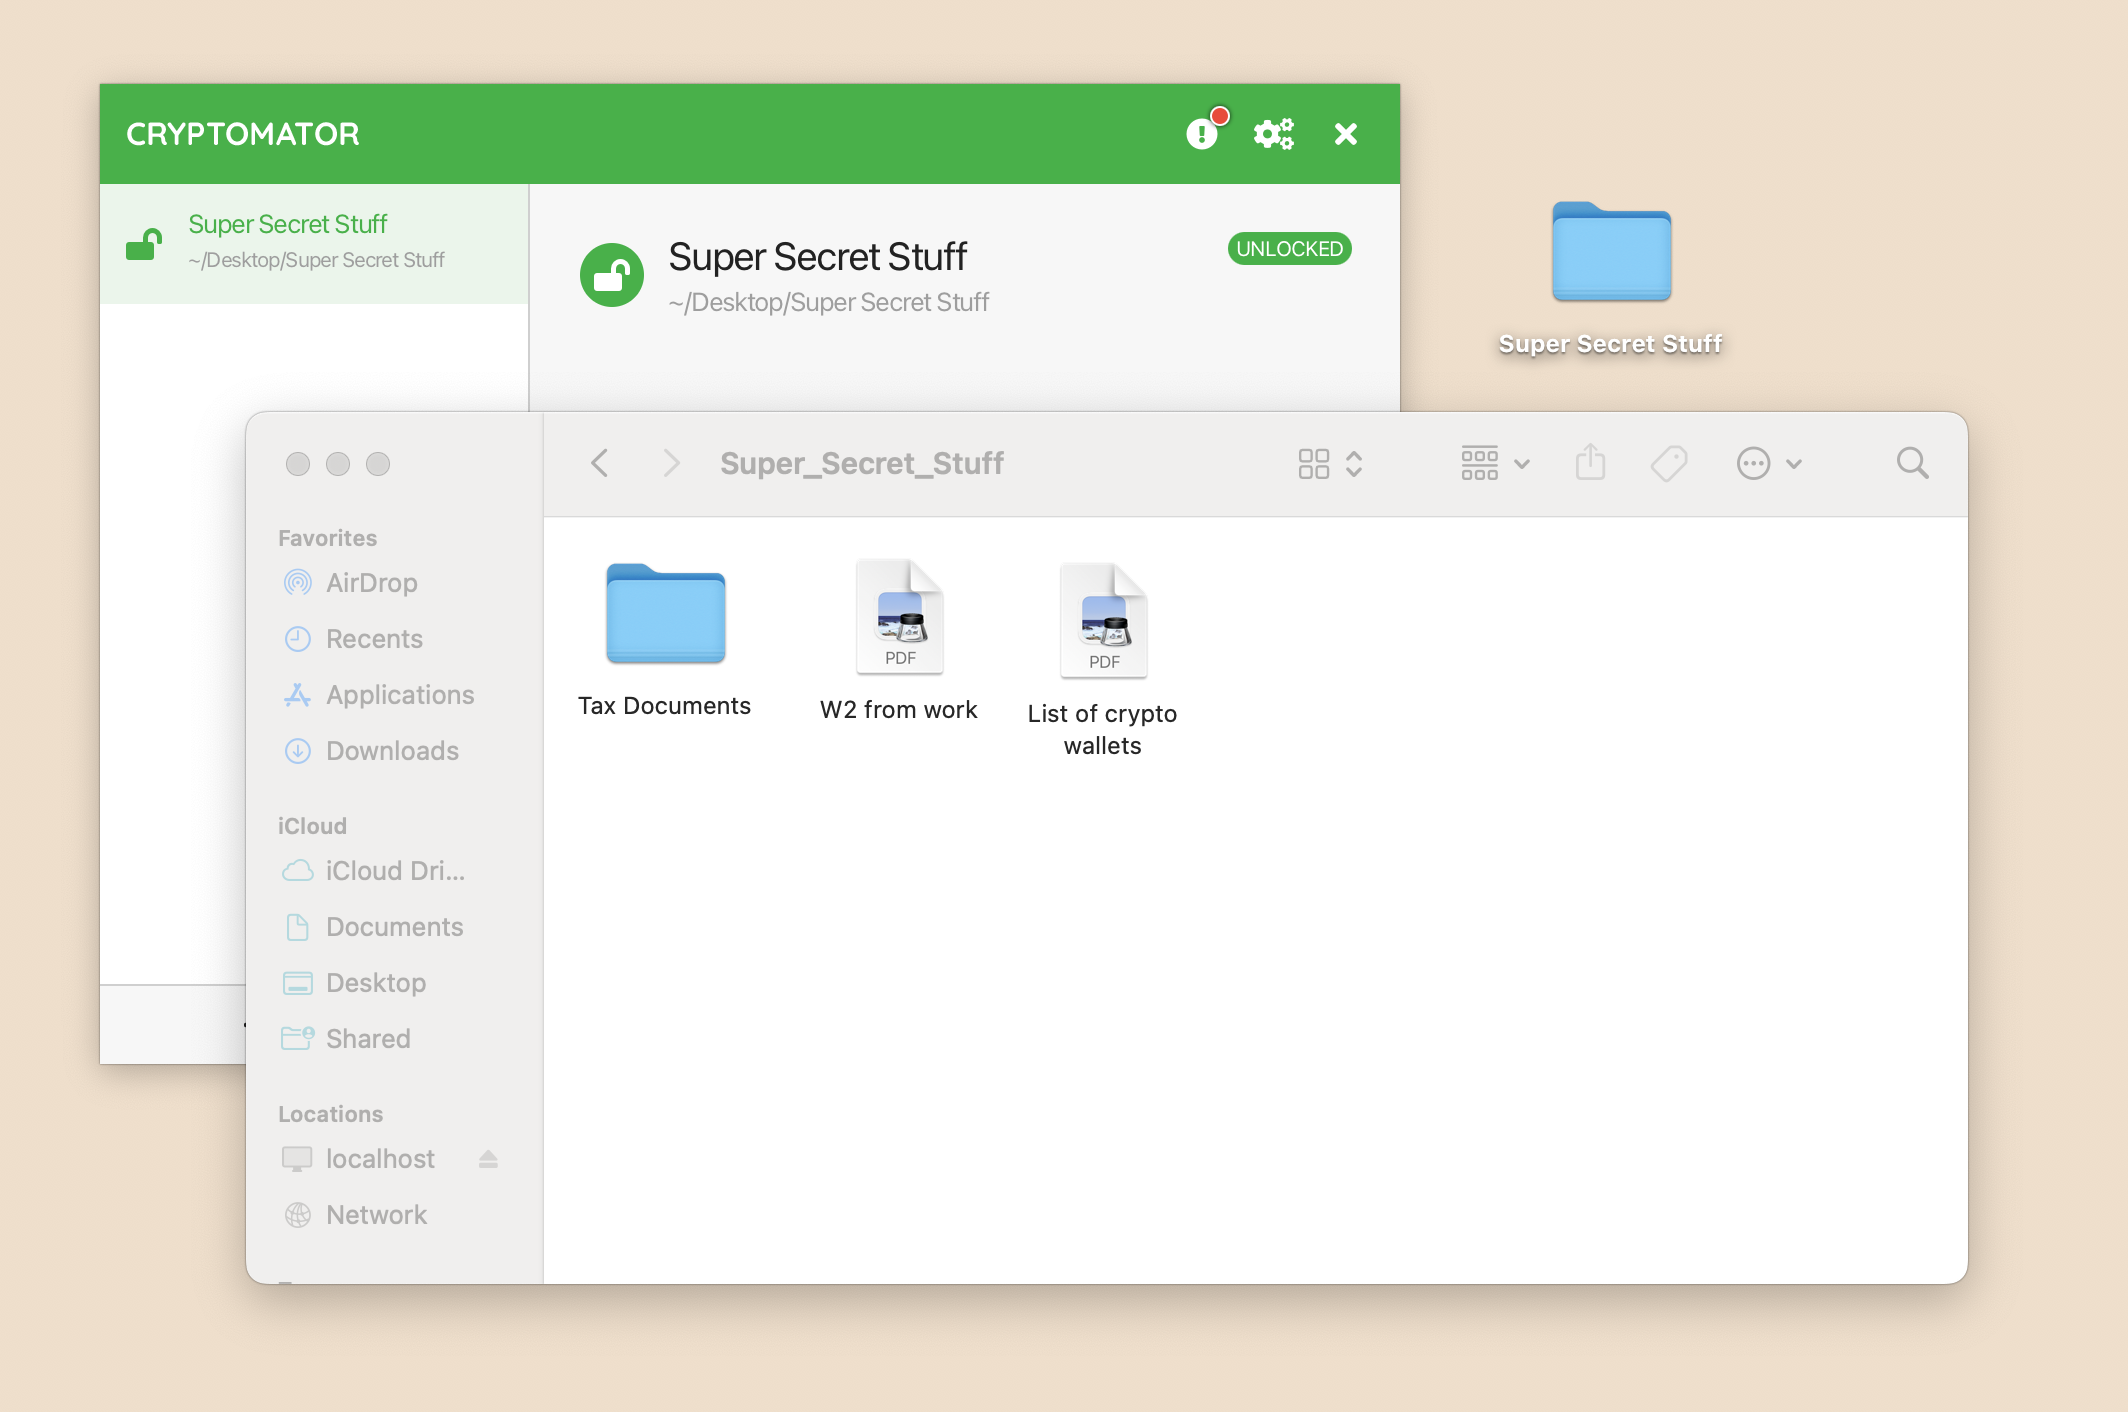
- Drag the files and/or folders you want to protect into this virtual drive.
- Lastly (and most importantly): close the virtual drive by locking the vault in Cryptomator when you’re done adding your files. After locking the vault, the virtual drive will “eject” (and with it, access to your sensitive data).
Step 4: Sync the Encrypted Vault to the Cloud (or Even Portable Drives)
Now that your files encrypted, the vault is safe to upload and sync with your favorite cloud provider. Whether you use Dropbox, Google Drive, iCloud Drive, or any other service, those companies will only ever see the gibberish stuff and never the unencrypted files.
Are you old school and use backup drives or USBs for data storage? Well, guess what? You can store your vault on there as well. My preferred method to avoid a single point of failure is to actually store important files in two separate locations: on-premise (physically) and in the cloud.
Step 5: Access Your Encrypted Files Later
Need to add a new file to the vault or download something from it?
- Open Cryptomator.
- Unlock your vault using your password.
- Access your files through the virtual drive, just like before.
- Always remember to lock the vault when you’re done.
Closing Thoughts
Using mainstream cloud services like Google Drive and Dropbox is convenient, but they don’t offer true end-to-end encryption. With Cryptomator, you can take control of your data security by encrypting your files before they even reach the cloud. By following the steps above, you can ensure that your sensitive information is protected from prying eyes — even those of the cloud provider itself.