Compared to Windows, the Mac operating system is known for being safe and secure out-of-the-box.
It’s tough to crack, but that doesn’t mean it’s invincible or that hackers can’t get into them.
Here are some simple tweaks you can make in under 10 minutes to improve the security posture of your computer.
These modifications are solely for its built-in settings, so I won’t be going over any external applications likes VPNs, privacy-focused browser alternatives, third-party firewalls, file encryption software, etc.
How to Secure MacOS
Whether you’re concerned about theft, snooping, or just want to make sure your data doesn’t get into the wrong hands, take a few minutes to follow these steps to secure your Mac.
1. Enable lock screen password after inactivity
It’s good practice to close your laptop or “lock your screen” (by going to the Apple menu > Lock Screen) whenever you have to step away from your computer. But sometimes you’ll forget. Or you’ll step away thinking you’ll only be away for a minute to grab your coffee from the pick-up counter, only to run into someone you know and get caught in an extended conversation.
That’s why you’ll want the lock screen to be activated automatically after a short period of inactivity.
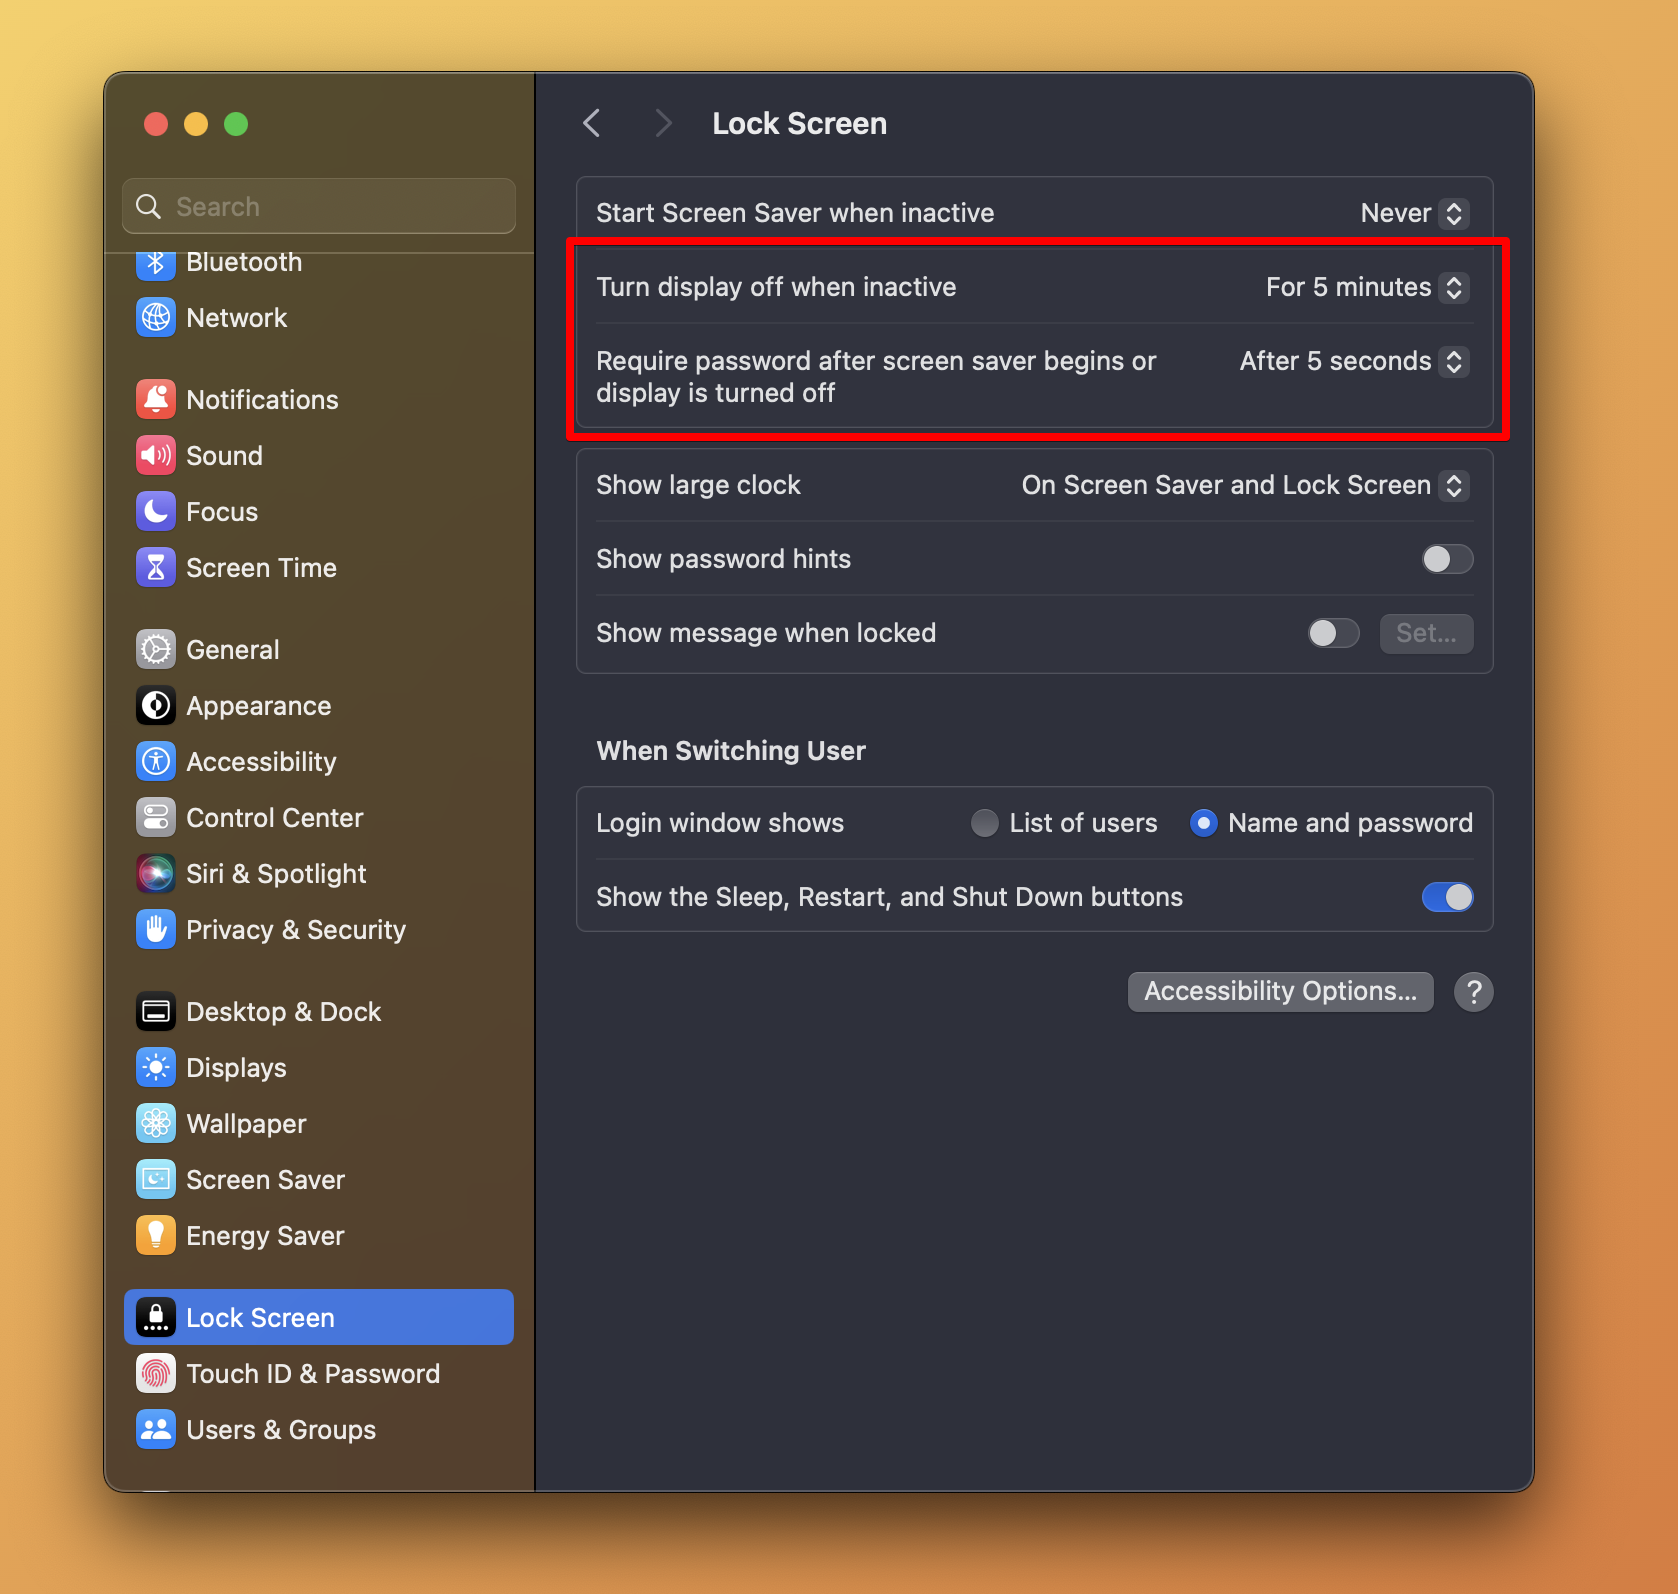
Go to System Settings > Lock Screen, and set “Turn display off when inactive” to something like 5 or 10 minutes. Then set “Require password after screen saver begins or display is turned off” to either “Immediately” or “After 5 seconds”. I have mine set to the latter for times when I’m watching long YouTube videos. The five-second window gives me just enough time to move my mouse to prevent the screen from locking on me.
2. Disable remote access and all “sharing” services
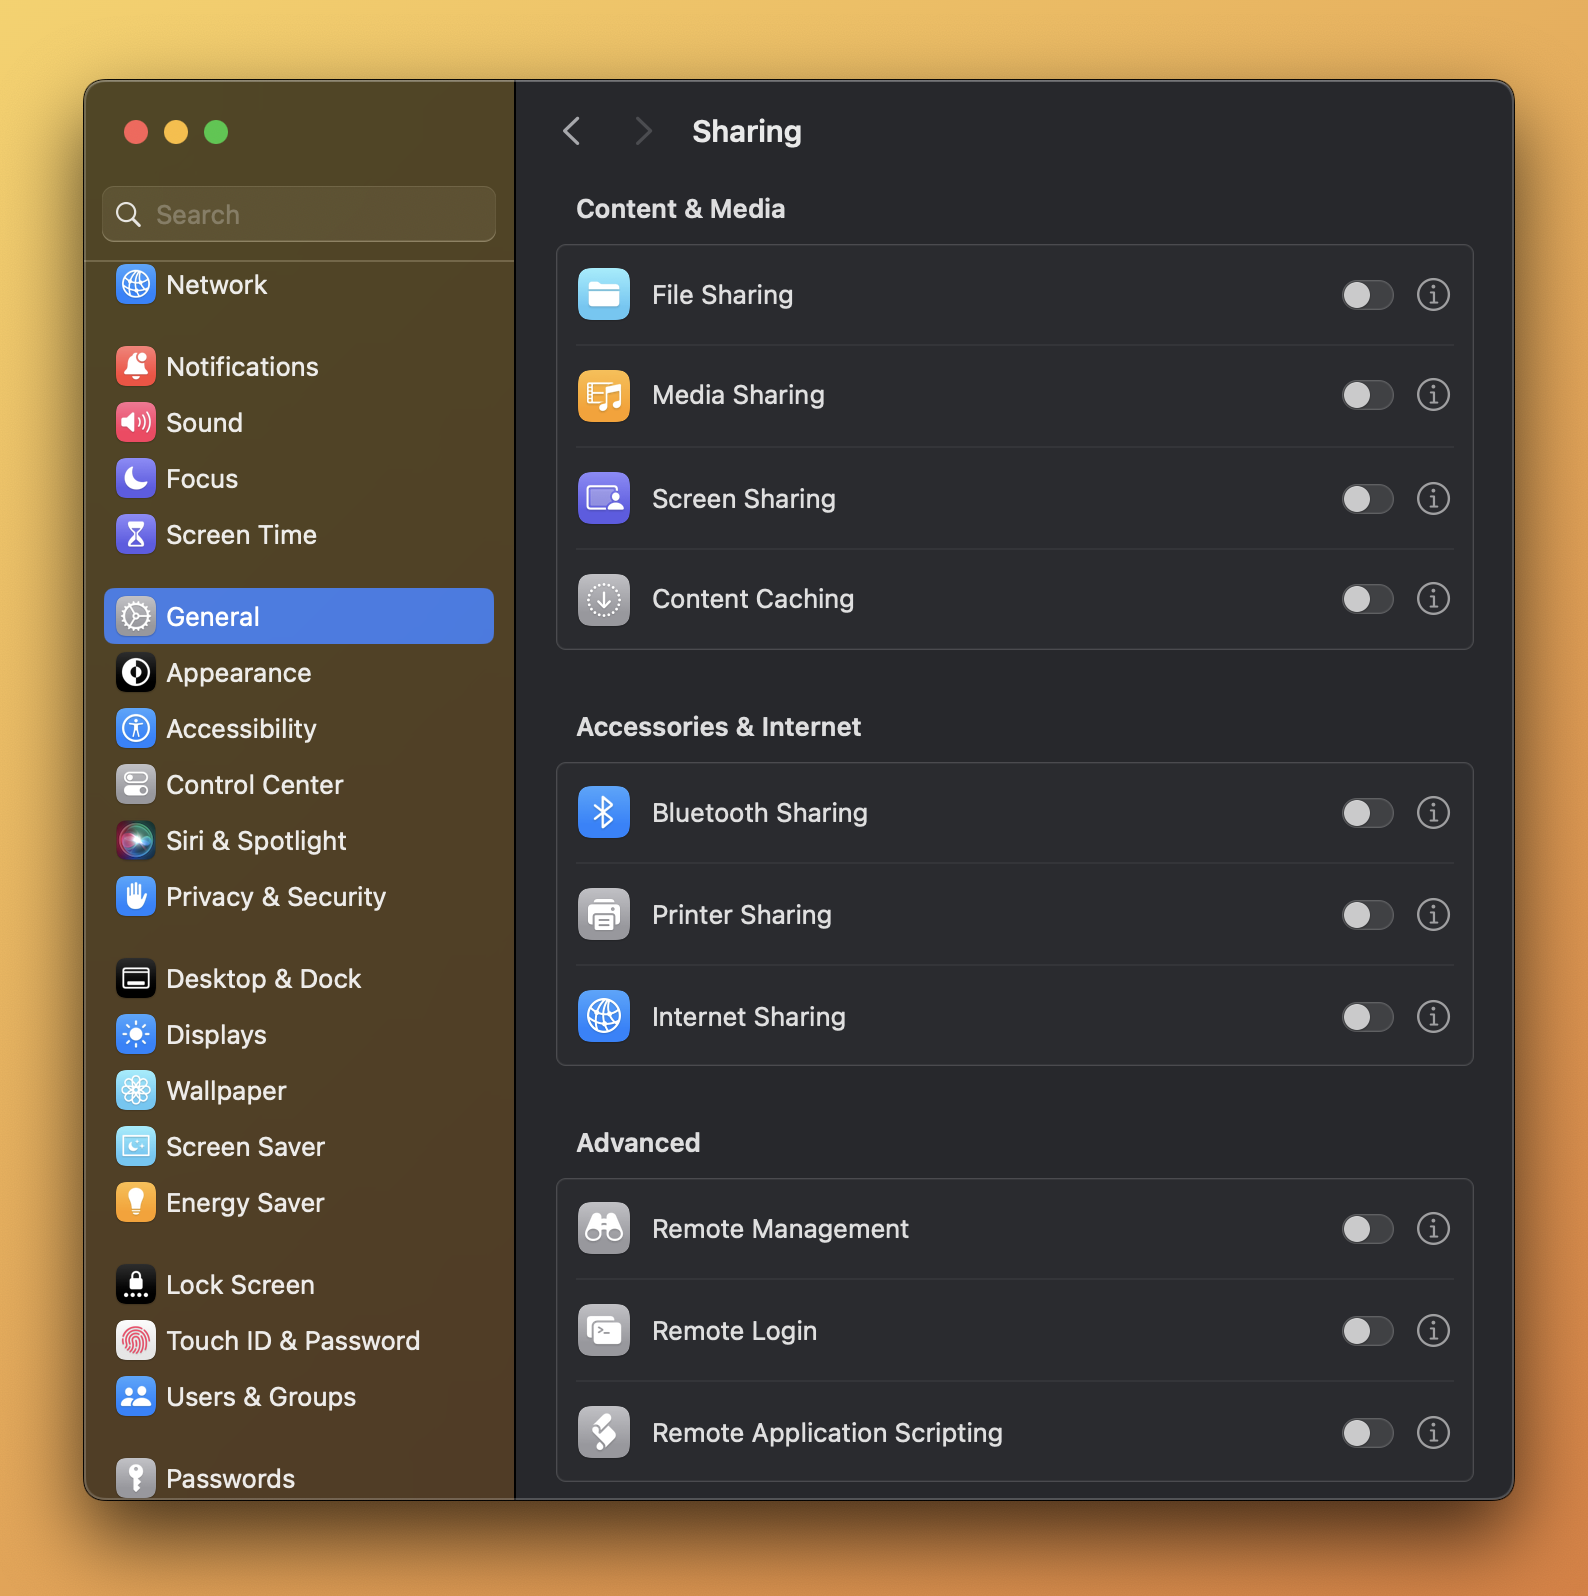
You should only enable the ones you really need to use like “Printer Sharing”, which allows other devices on your network to use the printer that’s connected to your Mac.
Go to System Settings > General > Sharing. Unless you use any of these on a regular basis, everything should be toggled off.
3. Enable automatic updates

This ensures that your computer always has the latest software patches installed. Ignoring important security updates can leave your Mac vulnerable to attacks.
Go to System Settings > General > Software Update, and then click the “i” icon next to “Automatic Updates”. Both “Install MacOS updates” and “Install application updates from the App Store” should be toggled on.
Now, if you prefer to install updates manually, just make sure “Install Security Responses and system files” is toggled on. This allows your computer to automatically install security patches whenever Apple comes out with them.
4. Allow only reputable applications from running
If you accidentally download a malicious app, your Mac can prevent it from running if you have this setting enabled.
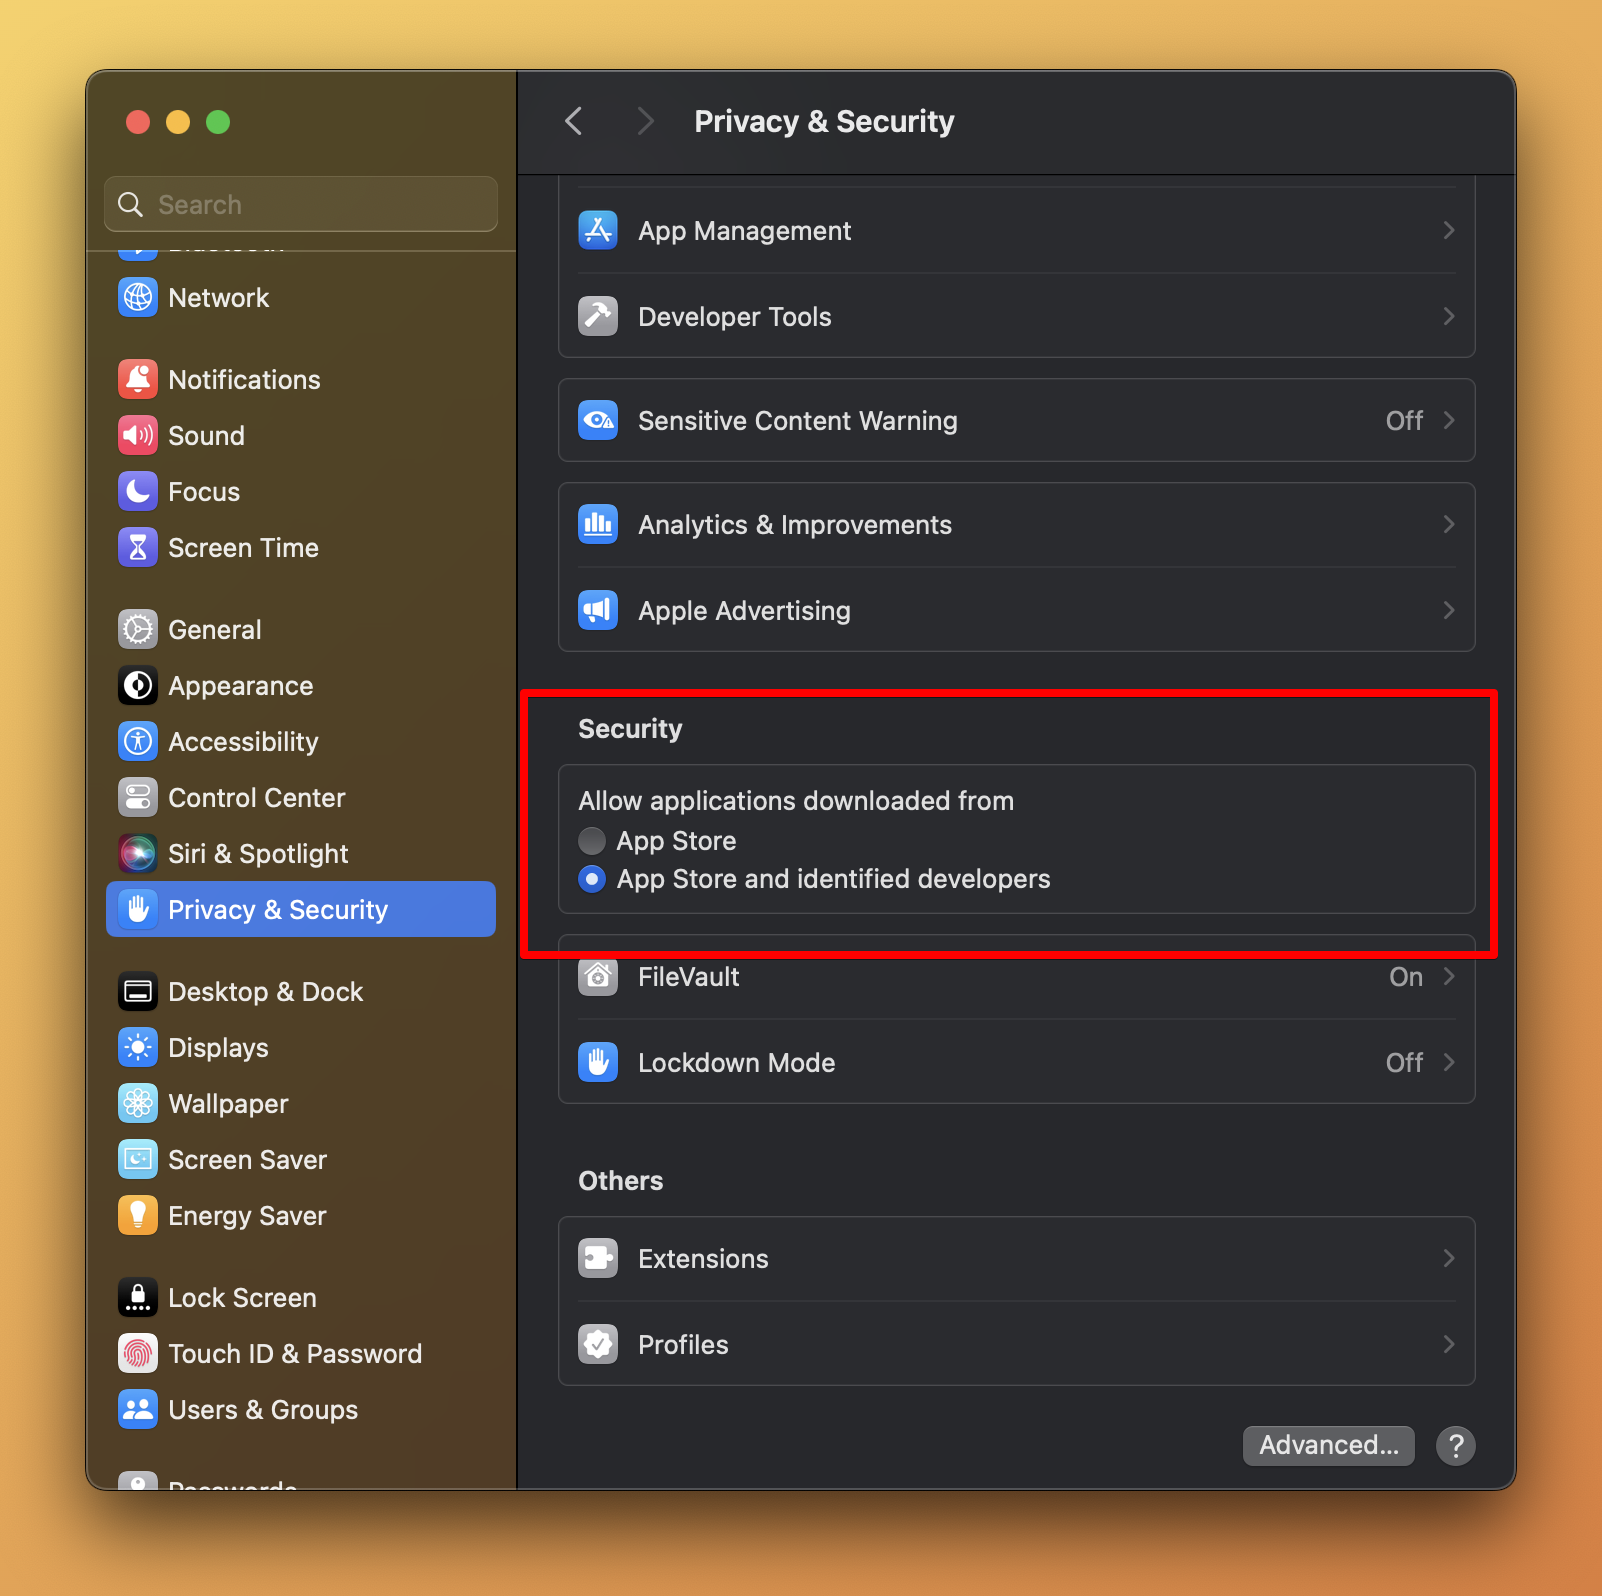
Go to System Settings > Privacy & Security, then scroll down to the “Security” section. Select “Allow applications downloaded from App Store and identified developers”.
5. Turn firewall ON

If your computer is regularly on a wifi (or ethernet) network you don’t own, you’ll want to enable your Mac’s basic firewall feature to reduce your exposure to network-based attacks.
Go to System Settings > Network > Firewall, and then turn it on. You’ll also want to click the “Options” button and turn on “Enable stealth mode”. This makes it harder for hackers using network scanning tools to find your Mac.
If you notice that certain apps are not working properly, add the application(s) to the application list and make sure “Allow incoming connections” is selected.
6. Turn FileVault ON for full-disk encryption
FileVault is a built-in security setting that encrypts all the data on your Mac’s hard drive. This prevents unauthorized access to your data, even if someone takes out the hard drive and tries to access the files.
To enable FileVault, go to System Settings > Privacy & Security > Security > FileVault. Click the “Turn On” button and follow the instructions.
7. Lastly, create a non-admin (standard) user account for daily use
By default, the first user account created on Macs have administrator privileges. If you’re ever compromised while using an admin account… well, you’re screwed.
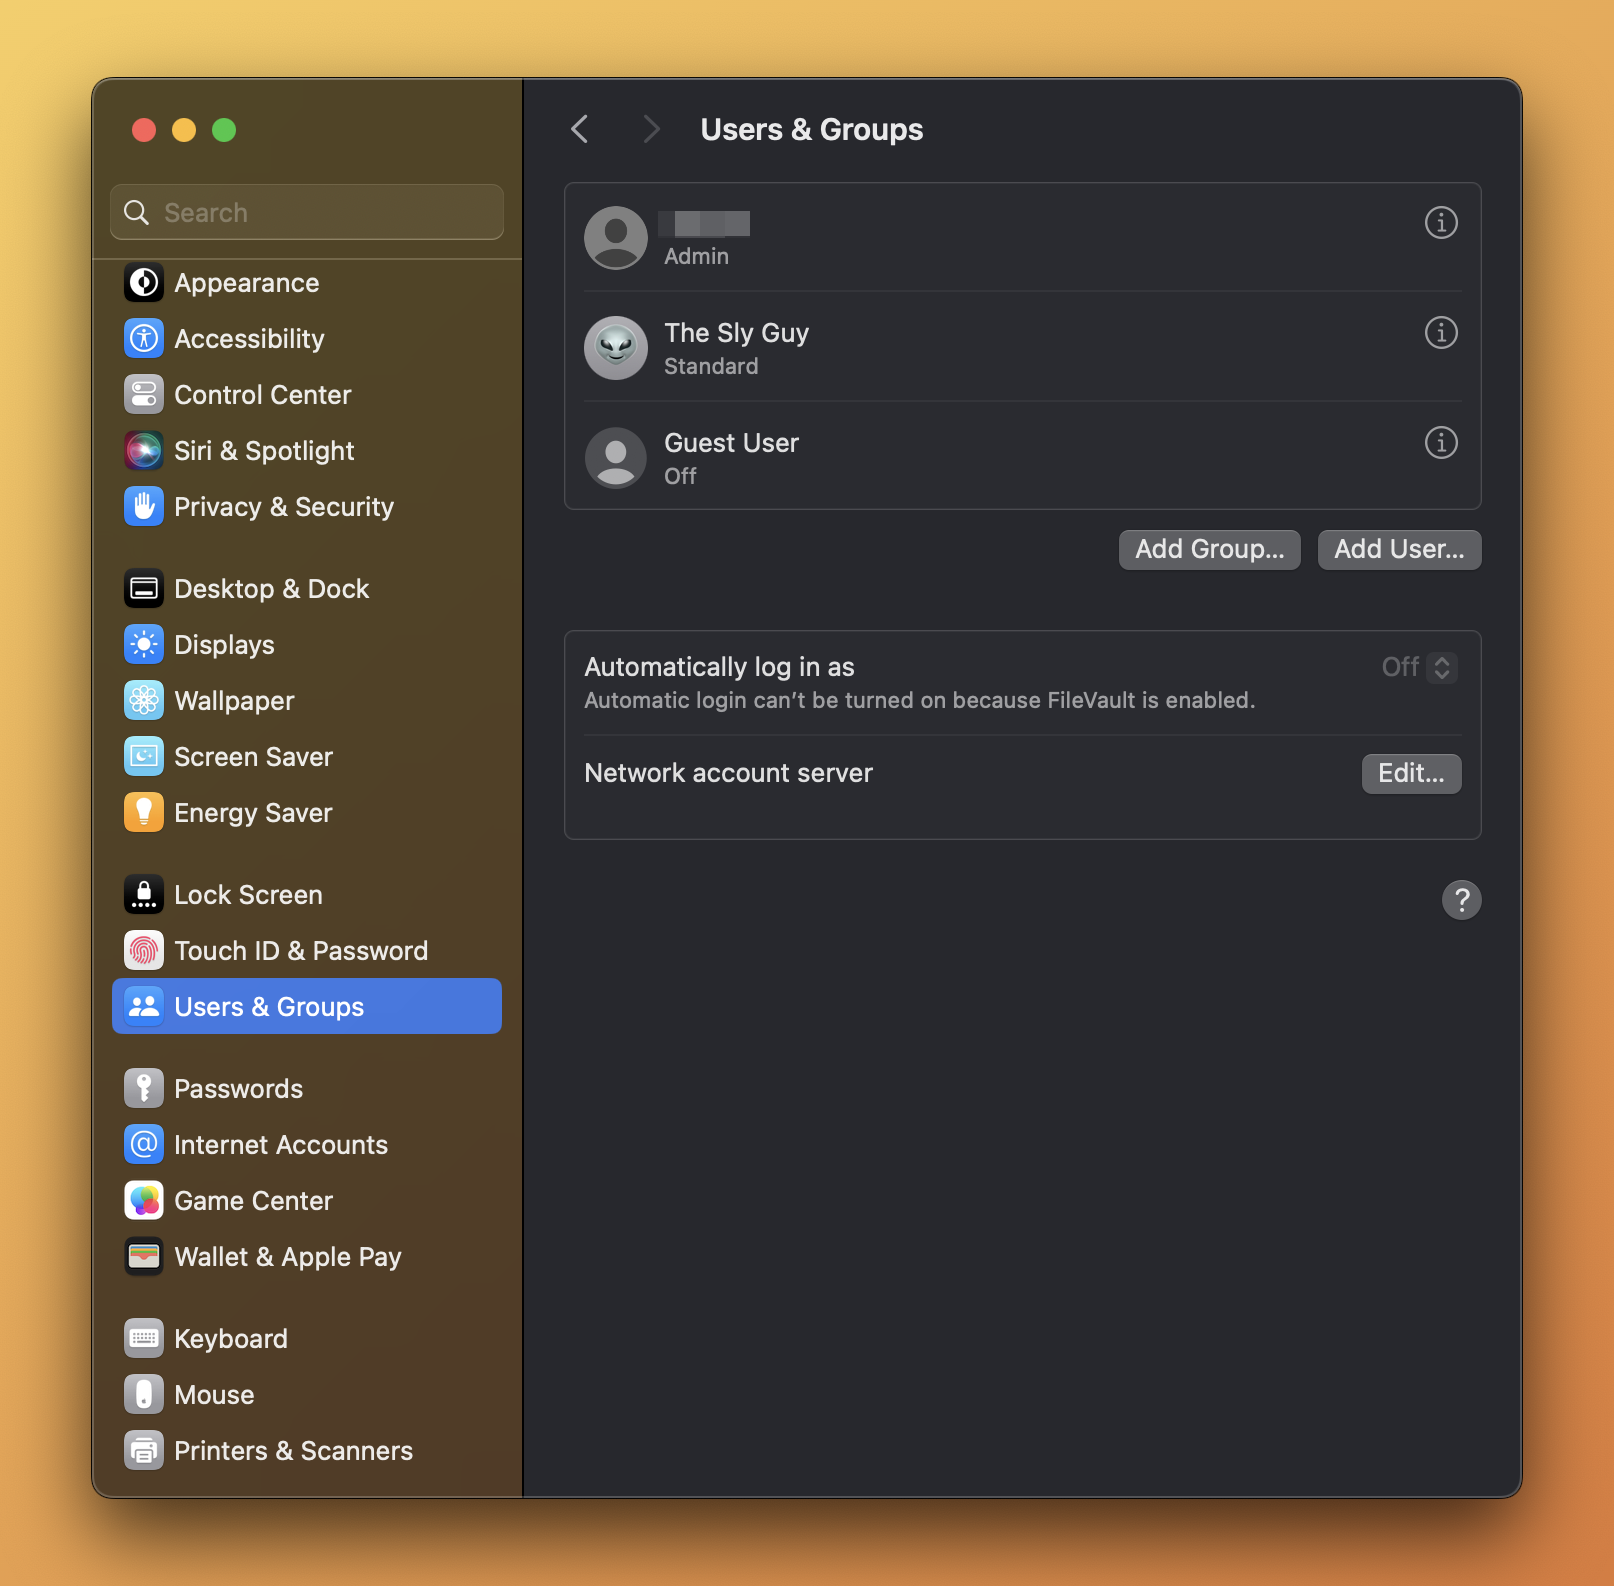
To create a new user account, go to System Settings > Users & Groups, and then click the “Add User” button. Set a strong password that you won’t forget (the same goes for your admin account).
Going forward, you shouldn’t have to log in to your admin account anymore. If you need to install software that requires an admin’s credentials, you’ll simply need to enter those credentials in the pop-up that shows up during the installation process.
Is That Everything?
Keep in mind that this is just a starting point.
For the majority of people, the things I listed above is enough to fortify your computer in case it gets lost, stolen, or misused by a bad actor.
In a future post, we’ll take things a step further by installing third-party apps such as a VPN.
Stay safe out there.